
***
Hi everyone! Mel wanted me to share how I made the pelmet box for my bedroom window. It was super simple and very inexpensive. I followed the tutorial from Little Green Notebook, however mine isn't as fancy shaped as hers. You can really choose whatever shape you'd like though, as you'll see from her tutorial. I won't give a complete breakdown of how I made it as you can find all the info at the link above,but I did add curtains to mine so I'll give a few extra details about that step below.
Materials:
2 white foam core boards (may need more or less depending on the size of your window)
utility knife
1 wooden dowel
fabric of choice
cotton batting
duct tape
glue gun
2 (or more) picture hangers
stapler (a regular office stapler worked fine for me!)
2 curtain panels
I purchased the foam core from Michaels for about $4.99 each - you can probably get them at the dollar store for cheaper. Oops. I got the wooden dowel from Michaels as well. The batting was from Fabricland.
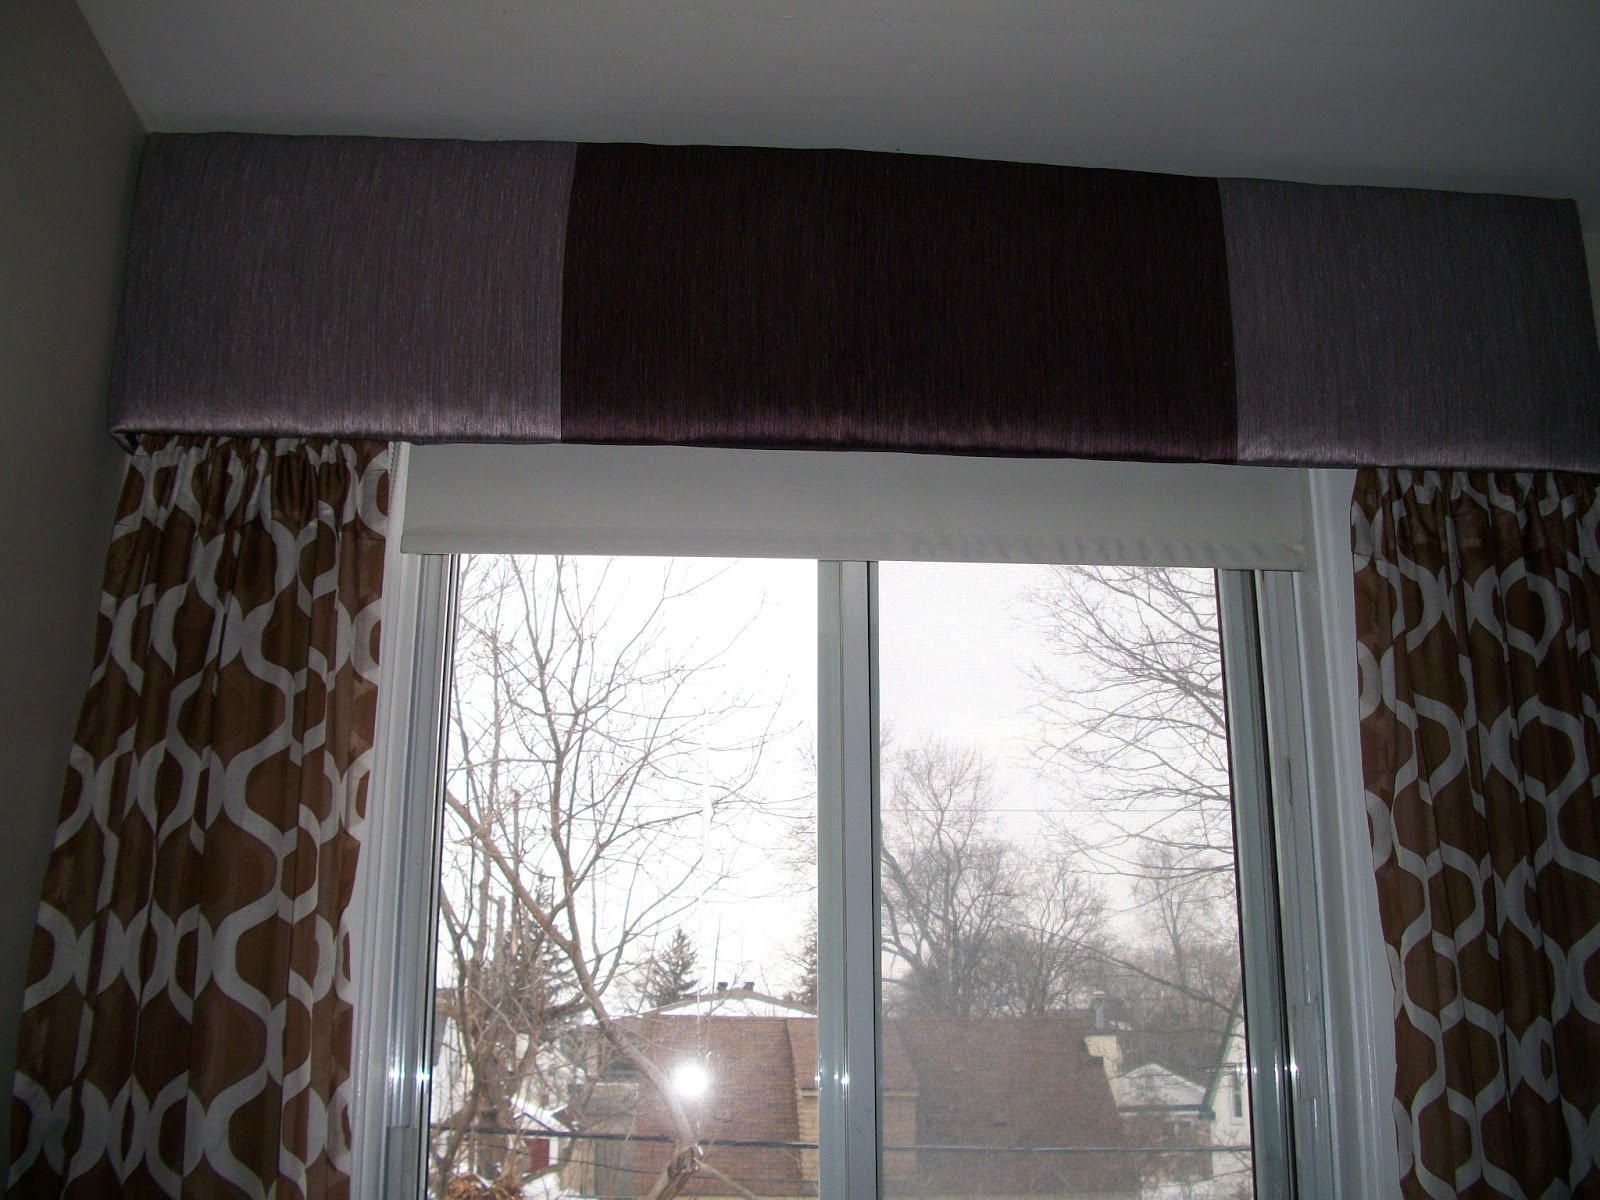
My pictures start out a little late in the process... I apologize! My camera also wasn't working so I had to take them with my phone. They are pretty bad quality quality but you get the gist! The picture below shows how I cut the 2 foam core boards to the appropriate height and length, duct taped them together in the middle, and then also duct taped on the 2 side pieces. The wider the side pieces the more it will stick out from the wall. I also added a small piece in the middle to give it a bit more stability - that piece actually rests on top of the window frame once hung up. By this point I had also cut the cotton batting to size and wrapped it around the foam core, hot gluing it in place. Here I am measuring my fabric.


Once cut, I stapled the fabric onto the foam core with a regular office stapler! I tried hot gluing it at first but it wasn't sticking to the cotton batting. The staples worked like a charm.

Here's what it looked like once the fabric was stapled on:

It could be hung up just like this, however, I wanted to add some fixed curtains to the sides so that they would hang beside my radiator and frame the window. I already had a roller blind on the window that I planned to keep, so they didn't need to be able to close for privacy - the curtains are purely decorative!
At this point be sure to have someone hold the pelmet box up at the height that it will be hung on the window, and make sure that your curtains are the right length before attaching them! You'll save yourself a lot of cursing if you do this step beforehand.
Now here is where the dowel comes in - I measured the dowel to the appropriate length (as you'll see from the finished pictures, the curtain on the left had to fit between the wall and the radiator, so I just used that measurement), and cut 2 pieces of dowel, one for each side. Thread your curtains onto the dowel and duct tape each end of the dowel onto the back of the pelmet box. I also secured them with hot glue just to be sure.


Hot glue the picture hangers on the 2 end pieces. The pelmet box is so light weight that it can just be hung on a small nail on each end.

Here's another handy tip: I found the 2 foam core pieces had a tendency to bend in the middle, no matter how much duct taped I used to hold them together. I had an extra piece of dowel left over so I duct taped it across the two pieces for more stability.

Hammer in your nails and hang it up, then stand back and admire your new window treatment!

***
Thanks Court! I love the way it turned out. The shiny purple fabric is my favourite part!
No comments:
Post a Comment
Please leave me your comments!! If you don't have a profile listed, choose Name/URL (you can leave the URL space blank, but please leave your name!) or you can choose anonymous :)