

No wait...before we keep going, is it just me or does that chair have an uncanny resemblance to the turkey Mr. Bean gets stuck on his head in his Christmas Special? No, just me seeing that? I digress... I'm letting mom take over now :)

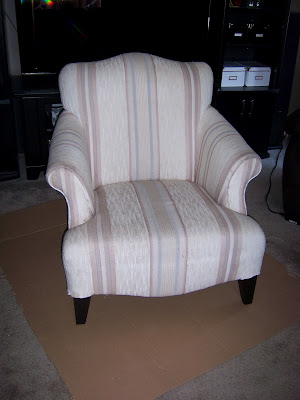
I bought this chair online for $20. Kind of ugly but I liked the lines of it. Notice how the fabric even covers the legs! Yuck!

LEGS: The first thing I did was remove that fabric from the legs. Then I stained and varathaned them a dark brown to match the rest of the furniture in my bedroom.
Now for the fun part! I decided to reverse engineer the process since I had no idea how to recover a chair... I started by ripping the back off. Soooo many staples and nails!

BACK OF THE SEAT: I draped a piece of fabric over the front of the chair large enough to stretch around the sides and just over the top. Then I stapled across the top, and trimmed the fabric a bit, leaving it long enough to tuck around the sides and down the seat.


ARMS: Next, I pulled the old fabric off the chair from under the arm. I draped my fabric over the arm and stapled it tightly underneath. I stapled the fabric at the front of the arm following the curve of the chair. Then I tucked the remaining fabric down the side of the seat.


SEAT: Cut the fabric really big. I tucked it down around the seat, pulled it tight, and stapled it underneath the front of the chair. I pulled the farbic around the side of the seat and stapled it under the chair's original vertical tack strip.


I added some nailhead trim over the fabric around the legs to secure it in place.


BACK: I used tack strips, once again, up each side of the back as high as the top of the arms. Then I stapled the fabric under the bottom of the chair. Because the chair had a curvy top, I couldn't use tack strips, so I left the fabric long enough to fold, following the curves of the chair, and held down with individual nailheads.


I added my nailhead trim to the back legs (like I did on the front ones) and it was done! (Tip: I cut strips of half inch PVC pipe and stuffed it down around the seat of the chair and the edges of the back of the seat. This helps hold the fabric in place. You can't even tell it's there!)

What do you think? I think it turned out really great! Definitely an improvement over the original, and it looks like it's worth way more than 20 bucks now! Thanks mom for letting me feature your project on my blog!
Psst - To see the rest of the bedroom projects check out the wardrobes, the hole, the bench, and the bedskirt. To see the final reveal click here.
Double Psst - I now have a special DIY page at the top of my blog! You can click on the page and find the links to all of my DIY posts or you can check it out here
Alright, 2 things:
ReplyDelete#1: Your mom did a fantastic job - the chair looks great!!
#2: I read your comment about Mr. Bean before I scrolled down to the side-by-side picture with the turkey, and I TOTALLY got the similarity!!
I know right?! It was all I could see when I looked at that chair. It's a bit better now sine the fabric isn't the colour of raw turkey :P
DeleteAnd she says thanks! She's quite proud of it!